Forwarded from Sisoog مرجع متن باز الکترونیک-سیسوگ
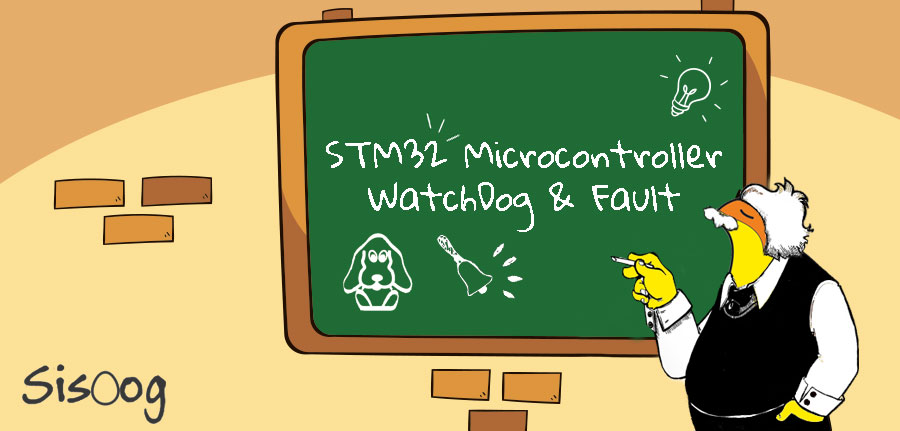
📌آموزش میکروکنترلر STM32 : تایمر واچ داگ و وقفه خطا
👈#سیسوگ #سیسوگی_ها #ARM #STM #آموزش #وقفه_خارجی #interrupt #STM32 #watch_dog #وقفه_خطا #تایمر_واچ_داگ #واچ_داگ
🤓 سلام دوستان.
⏮ سیسوگ در مقاله پنجم آموزش میکروکنترلر STM32 ، آموزش داد که چطور چند وقفه خارجی در برنامه داشته باشیم و چطور باید آن ها از یکدیگر تفکیک کنیم.
🔔 در این مقاله در ابتدا، تنظیم لبه بالا رونده و پایین رونده هر پین از پورت را آموزش می دهد و سپس طریقه کار با تایمر واتچ داگ را آموزش می دهد و در نهایت وقفه های خطا را معرفی می کند. با سیسوگ همراه باشید.
〽️ تنظیم لبه بالا رونده و پایین رونده هر پین
خوب حالا که یاد گرفتیم چطور می توانیم از طریق توابع کتابخانه hal لبه وقفه خارجی خود را تغییر بدهیم، بهتر است یک راه حل مناسب و ساده تر برای اینکار پیدا کنیم آن هم راه حل استفاده از کار مستقیم با رجیسترها است. برای این منظور فقط لازم است با دو رجیستر ساده با نام های EXTI->RTSR که به انتخاب لبه بالا رونده هر پین از پورت مربوط می شود و رجیستر EXTI->FTSR که به انتخاب لبه پایین رونده هر پین از پورت مربوط می شود، کار کنیم.
🐶 تایمر واتچ داگ
در این قسمت طریقه کار با تایمر واتچ داگ را خواهیم آموخت، طبق معمول نرم افزار cubemx را باز می کنیم و بعد از تنظیم بخش کلاک میکرو و پروگرامر و دیگر تنظیمات مورد نیاز را انجام می دهیم.
❌ وقفه خطا
در میکروکنترلر STM32 ما چهار وقفه خطا متفاوت داریم. که در برگه stm32f1xx_it.c می توانید روتین های وقفه مربوطه را ببینید.
ادامه مطلب
📣 عضویت در کانال تلگرام سیسوگ
آموزش gpio در stm32f0 با cubemx
https://letanphuc.net/2015/02/stm32f0-tutorial-gpio-blinking-led-cubemx-keil-source-insight/
🔰 @c_micro
https://letanphuc.net/2015/02/stm32f0-tutorial-gpio-blinking-led-cubemx-keil-source-insight/
🔰 @c_micro
LTP's archive
STM32F0 Tutorial 2 (GPIO): Blinking LED with CubeMX
In the first tutorial, I have shown some software that you needed to install to play with STM32F0. This STM32F0 tutorial will straightforwardly show how to create a new blinking LED project for STM32F0 Discovery kit with STM32CubeMX and then, generate Keil…
Media is too big
VIEW IN TELEGRAM
شبیه سازی یک دیمر تک فاز آنالوگ در محیط نرم افزار پروتیوس
با تغییر مقدار پتانسیومتر شدت نور لامپ تغییر می کند. به ولتاژی که ولت متر دو سر لامپ نشان میدهد دقت کنید!
⚡️الکترونیک قدرت کاربردی⚡
@C_MICRO
با تغییر مقدار پتانسیومتر شدت نور لامپ تغییر می کند. به ولتاژی که ولت متر دو سر لامپ نشان میدهد دقت کنید!
⚡️الکترونیک قدرت کاربردی⚡
@C_MICRO
آموزش تایمرکانتر و pwm در stm32f0
https://letanphuc.net/2015/06/stm32f0-timer-tutorial-and-counter-tutorial/
🆔 @C_MICRO
https://letanphuc.net/2015/06/stm32f0-timer-tutorial-and-counter-tutorial/
🆔 @C_MICRO
LTP's archive
STM32F0 Tutorial 4: Timer and Counter
In this post, we will explore the Timer and Counter of STM32F0 using CubeMX. In this STM32F0 timer tutorial, I will try to cover as many functions of the STM32F0’s Timer as possible because this peripheral may have the greatest features and functions among…
مانیتورینگ متغیرها در stm32 با stm studio
https://letanphuc.net/2015/04/stm-studio-variables-monitoring-and-visualization-tool-for-stm32/
🆔 @C_micro
https://letanphuc.net/2015/04/stm-studio-variables-monitoring-and-visualization-tool-for-stm32/
🆔 @C_micro
LTP's archive
STM Studio: Variables monitoring and visualization tool for STM32
In the previous tutorials, I have shown how to use the simple GPIO and external interrupt of the STM32. Since these peripherals are connected with external pins, we can visually observe how it works through some LEDs of the Discovery kit. Therefore, it is…
❇️ مثال های کاربردی برای printf
#include <stdio.h>
int main()
{
printf ("Characters: %c %c \n", 'a', 65);
printf ("Decimals: %d %ld\n", 1977, 650000L);
printf ("Preceding with blanks: %10d \n", 1977);
printf ("Preceding with zeros: %010d \n", 1977);
printf ("Some different radices: %d %x %o %#x %#o \n", 100, 100, 100, 100, 100);
printf ("floats: %4.2f %+.0e %E \n", 3.1416, 3.1416, 3.1416);
printf ("Width trick: %*d \n", 5, 10);
printf ("%s \n", "A string");
return 0;
}
OUTPUT:
Characters: a A
Decimals: 1977 650000
Preceding with blanks: 1977
Preceding with zeros: 0000001977
Some different radices: 100 64 144 0x64 0144
floats: 3.14 +3e+000 3.141600E+000
Width trick: 10
A string
🔰 @c_micro
❇️ سینتکس nested switch
switch(ch1) {
case 'A':
printf("This A is part of outer switch" );
switch(ch2) {
case 'A':
printf("This A is part of inner switch" );
break;
case 'B': /* case code */
}
break;
case 'B': /* case code */
}
❇️ @c_micro
switch(ch1) {
case 'A':
printf("This A is part of outer switch" );
switch(ch2) {
case 'A':
printf("This A is part of inner switch" );
break;
case 'B': /* case code */
}
break;
case 'B': /* case code */
}
❇️ @c_micro
❇️ مثال های کاربردی برای scanf
#include <stdio.h>
int main ()
{
char str [80];
int i;
printf ("Enter your family name: ");
scanf ("%79s",str);
printf ("Enter your age: ");
scanf ("%d",&i);
printf ("Mr. %s , %d years old.\n",str,i);
printf ("Enter a hexadecimal number: ");
scanf ("%x",&i);
printf ("You have entered %#x (%d).\n",i,i);
return 0;
}
OUTPUT :
Enter your family name: Soulie
Enter your age: 29
Mr. Soulie , 29 years old.
Enter a hexadecimal number: ff
You have entered 0xff (255).
🔰 @C_micro
❇️ Calling a Function
💎 مثالی برا صدا زدن تابع
#include <stdio.h>
/* function declaration */
int max(int num1, int num2);
int main ()
{
/* local variable definition */
int a = 100;
int b = 200;
int ret;
/* calling a function to get max value */
ret = max(a, b);
printf( "Max value is : %d\n", ret );
return 0;
}
/* function returning the max between two numbers */
int max(int num1, int num2)
{
/* local variable declaration */
int result;
if (num1 > num2)
result = num1;
else
result = num2;
return result;
}
OUTPUT :
Max value is : 200
🔰 @C_micro
اندازه گیری ولتاژ آنالوگ با ADC میکروکنترلر stm32f0103c8
https://circuitdigest.com/microcontroller-projects/how-to-use-adc-in-stm32f103c8-stm32-blue-pill-board
🆔 @C_MICRO
https://circuitdigest.com/microcontroller-projects/how-to-use-adc-in-stm32f103c8-stm32-blue-pill-board
🆔 @C_MICRO
مثالی جهت آموزش pointers
#include <stdio.h>
int main ()
{
int var = 20;
int *ip;
ip = &var;
printf("Address of var variable: %x\n", &var );
printf("Address stored in ip variable: %x\n", ip );
printf("Value of *ip variable: %d\n", *ip );
return 0;
}
OUTPUT :
Address of var variable: bffd8b3c
Address stored in ip variable: bffd8b3c
Value of *ip variable: 20
🔰 @c_micro